Aim
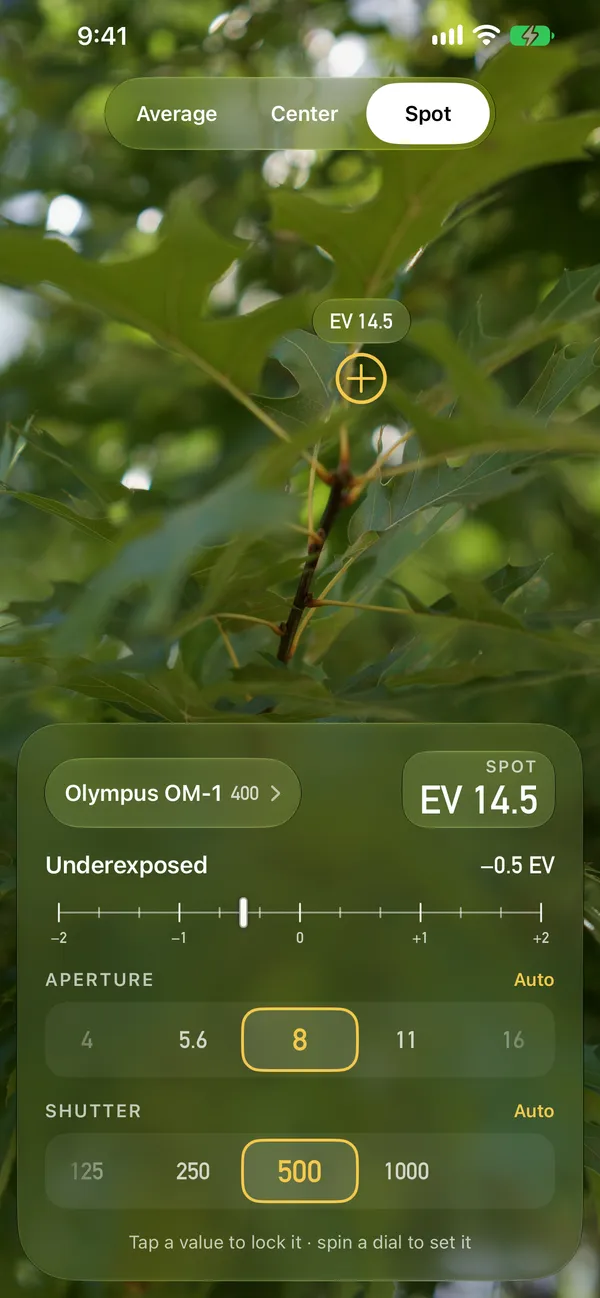
Choose Average, Center or Spot, and tap the picture to put the spot on what matters.

A light meter for film photographers.
Light Right turns your iPhone into a reflected-light meter for manual film cameras. Point it at the scene, choose what to expose for, and read the aperture and shutter speed off two dials, then set them on the camera in your other hand.
How it works
Three steps between the scene and the camera, all on one screen.
Choose Average, Center or Spot, and tap the picture to put the spot on what matters.
Lock the aperture or the shutter speed and the meter works out the other. Lock both, and a needle shows how far off you are.
Tap the reading or press a volume button to freeze it, then set your camera at leisure.
What it does
Average, Center or Spot, placed with a tap. Two dials that each follow the meter or stay where you lock them, and a needle like the one in a viewfinder.
Metering
Average meters everything between the controls. Center meters a weighted area in the middle. Spot reads about 5° of the scene, wherever you tap. What is framed on screen is what is read.
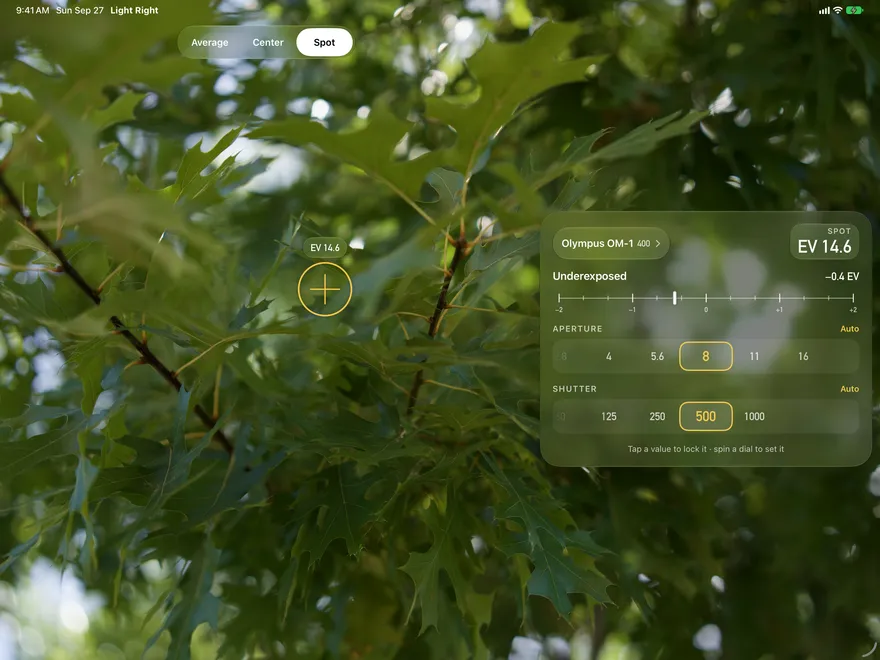
The needle runs two stops either side, in thirds. Within a third of a stop counts as correct; past the end, it pins with an arrow and writes the true difference beside it. The same on iPad, with its rear camera.
Hold
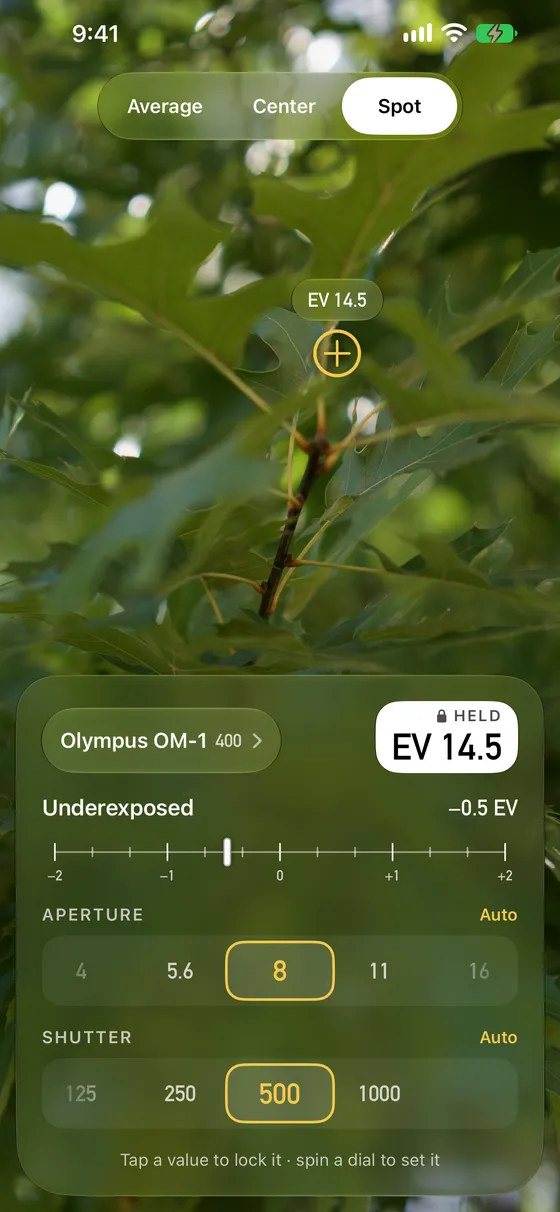
Tap the reading, or press a volume button or Camera Control, and it holds. The reading is marked HELD and the picture freezes with it, so you can see what you metered while you set the camera.
The dials, film speed and compensation still work against a held reading. Tap a new spot, change mode or turn the phone to let it go.
Film
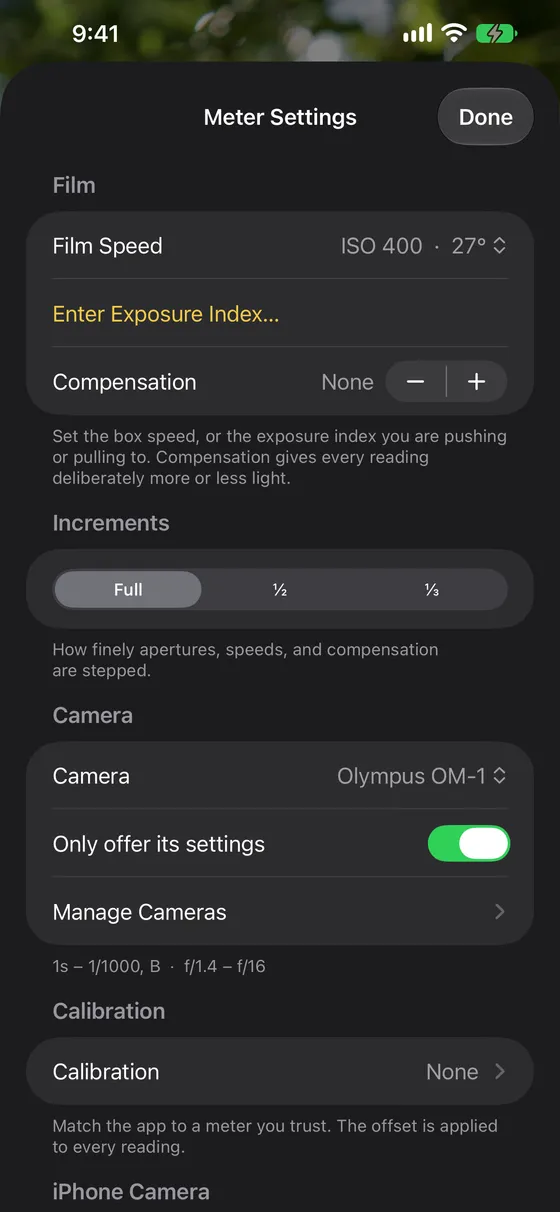
Film speed from ISO 12 to 6400 in the standard third-stop series, each with its DIN equivalent, or any exposure index typed in for film pushed or pulled.
Apertures, speeds and compensation step in full, half or third stops. Compensation runs to ±5 stops, is flagged on the meter while it’s set, and stands in for a filter too: a red filter is about +3.
Calibration
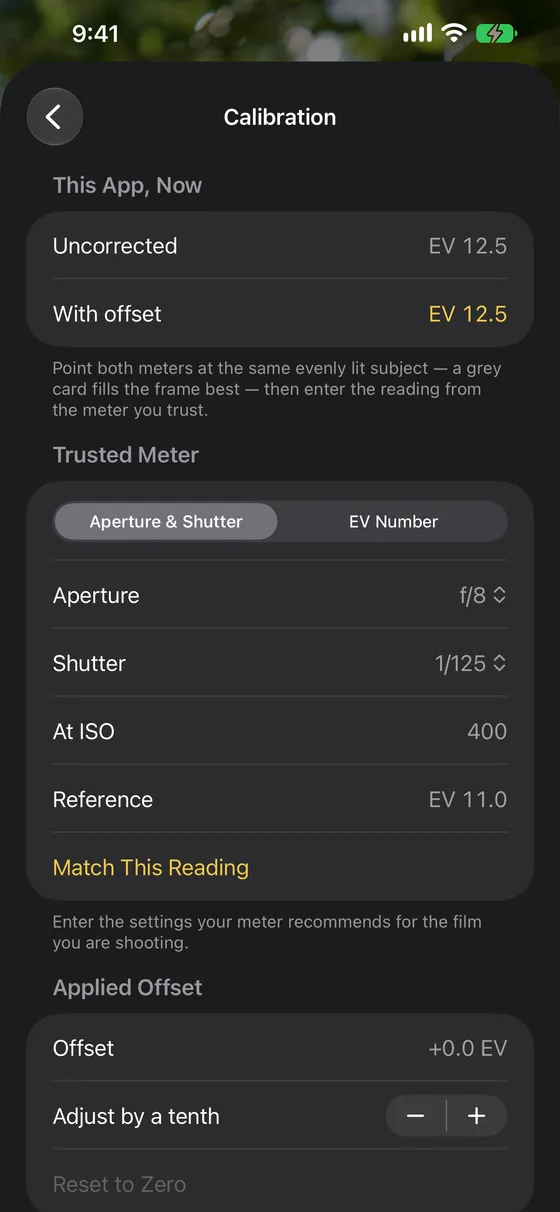
A phone’s camera is tuned for pleasing photographs, not the standard a handheld meter is built around. Calibrate once against a grey card and every reading after carries the offset.
The offset is kept in tenths of a stop, and can be nudged or reset. Step by step under Calibration in the help below.
Past the camera’s slowest marked speed, the shutter dial carries on to 60 seconds and tells you how long to hold B open. That’s the metered time, before your film’s reciprocity correction.
The live view shows the scene as it is, whatever the dials say, so it stays quick in the dark. The needle is what shows the exposure.
Settling… while the phone adjusts to a new scene, and a warning when a reading goes past what the phone’s camera can measure directly and is only approximate.
The numbers
Apertures and shutter speeds are kept at their exact values, and only shown as the figure engraved on the barrel or the dial.
Cameras
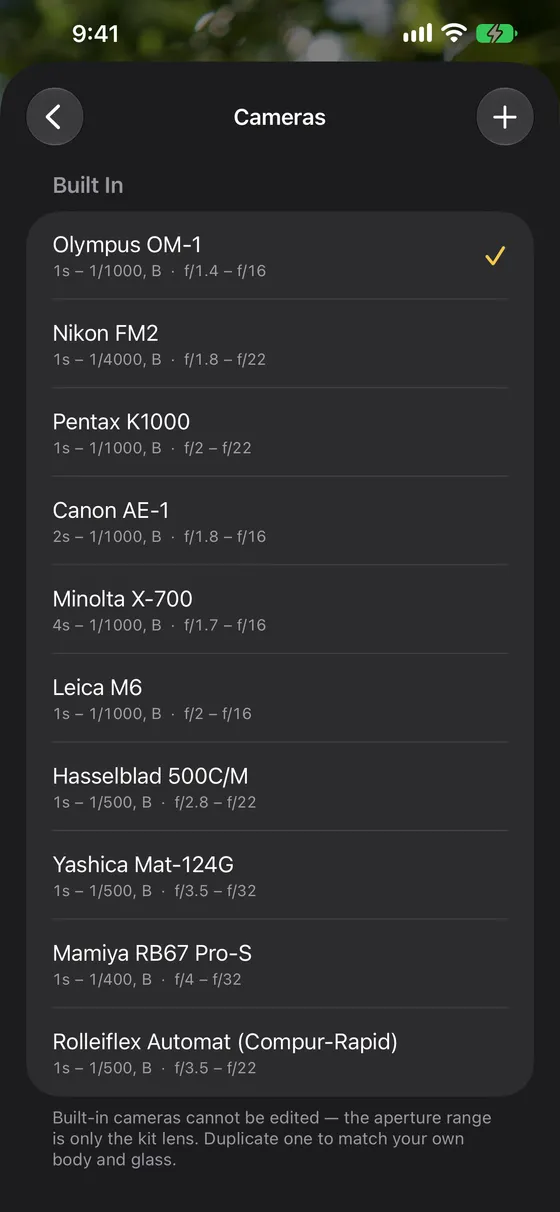
Pick a camera and turn on “Only offer its settings”, and the dials keep to the speeds and apertures actually engraved on that body, down to a Compur dial’s irregular 1/25 and 1/50.
Bundled or your own
A set of common cameras comes bundled, so most people never have to set one up. If yours isn’t there, duplicate the nearest one and change it, or build your own from scratch.
Tick every speed marked on the shutter dial, irregular dials included, say whether it has a bulb setting, and set the widest and smallest apertures of the lens you have mounted. A bundled camera’s apertures are only its kit lens, which is why Duplicate & Customize is there.
Price and privacy
Light Right reads the light through the camera, and that is all. Nothing is photographed, saved or sent anywhere, and the App Store privacy label reads Data Not Collected.
Every feature on this page is in the free download. No ads, no subscription and nothing held back.
Nothing to sign up for and nothing watching what you meter. The app makes no network requests of its own.
Camera access is used only to read the scene. The picture on screen is never saved, and never leaves the device.
Metering happens on the phone, so it works in the field with no connection at all.
Help
For when the app is open and the camera is in your other hand. Every control is named as it appears in the app.
Allow camera access when asked. The camera is only used to measure light. Then open Meter Settings and set the film speed.
Average meters everything between the controls.Center meters a weighted area in the middle. Spot meters a small area, about 5° of the scene, wherever you tap. What is framed on screen is what is read.
When the meter calls for longer than the camera’s slowest marked speed, the shutter dial carries on to 60 seconds, markedB 8s and so on, and the hint reads Set the shutter to B · hold it open for 8s.
This is the metered time. Film loses sensitivity over long exposures, which is reciprocity failure, so check your film’s data sheet and add its correction. The app doesn’t do this for you.
With neither dial locked, the meter opens the lens before it goes to B, so you only need a cable release when there’s no other way.
A phone’s camera is tuned for pleasing photographs, not the standard a handheld meter is built around, so Light Right may read a little differently from a meter you trust. Calibrating once fixes that for every reading after.
The offset is then shown and can be nudged a tenth of a stop at a time, or reset to zero. A positive offset makes the app read brighter, giving less exposure.
What the app might tell you, and what to do.
With any camera whose aperture and shutter you set by hand. Choose Any camera for the full scale, or set up a profile for yours.
That depends on the phone. Calibrate it once against a meter you trust, especially before shooting slide film, which forgives less.
The live view shows the camera as it is, whatever the dials say, so it stays quick in low light. The needle is what shows the exposure.
No. It is a reflected-light meter, and a phone can’t do either properly without extra hardware.
Yes, with the rear camera. Not on a Mac or Apple Vision Pro, which have no rear camera.
Yes. No ads, no subscription and nothing to unlock. If it helps you get an exposure right, there’s a tip jar at the bottom of Settings, from a Small Tip to a Roll of Film. Tips are entirely optional and unlock nothing.
Yes. Only the tip jar needs a connection.
No. Nothing is photographed, saved or sent.